")
Field Engineer’s Notes (From the Trenches)
The “Gotcha” is Terminal Base Type & 1-5V vs 4-20mA Range Setting.
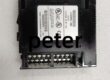
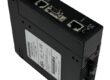
Terminal Block (IC200TBM001): The ALG320 itselfhas no screw terminals. You must snap an IC200TBM001 (Terminal Block Module) onto the right sideof the ALG320. It carries the field wiring (Ch1+/Ch1-/Com etc.).
- Newer VersaMax bases (IC200CHS006/022 with ‘T’ suffix or later)have integrated terminals on the base itself — in that case you wire directly to the base, no TBM001 needed (but TBM001 is backwards-compatible if you want to extend wiring).
- Always verify you have the TBM001 if using older stock bases — forgetting it = “no place to land wires.”
1-5V (4-20mA Emulation): The ALG320 has an internal 250Ω shunt for 4-20mA. If you have a voltage transmitteroutputting 1-5V representing 4-20mA:
- Option A: Set channel to “Voltage — 1-5V” (if available in your firmware) and scale in PLC (1V=4mA, 5V=20mA).
- Option B: Use an external250Ω precision resistor across +In and –In, set channel to “4-20mA” — the 1-5V drop across the resistor equals 4-20mA equivalent.
- Do NOT set “4-20mA” range and land a 10V signal — you’ll read Overrange (10V/250Ω = 40mA reading) and possibly stress the input if sustained >30V.
Filter Setting: Default is often “No Filter.” In VFD-heavy areas, set to 8ms or 16ms in the channel config. A 0ms filter makes a 4-20mA flow signal look like a sawtooth on trend due to 60Hz ripple. Don’t over-filter fast position feedback — 4ms is usually safe for process variables.
Real-World Applications
- Chemical Reactors (Multi-Variable): One in a VersaMax rack reads: Ch1 = 4-20mA Reactor Temp (RTD Tx), Ch2 = 4-20mA Jacket Temp, Ch3 = 0-10V Agitator Amps (Transducer), Ch4 = 4-20mA Feed Flow. The 16-bit resolution catches a 0.2°C drift in the jacket temp, allowing the lead/lag cascade to react before the setpoint is violated. Open Wire detect caught a corroded Tx wire on the feed flow during commissioning.
- Water Treatment (Level & Pressure): Distributed I/O station near the wet well — ALG320 reads 4-20mA from submersible level Tx and suction/discharge pressure Txs. The Genius/NIU backplane (if used with ERM) or Ethernet NIU polls it every 100ms. The 8ms filter rejects EMI from the nearby VFD-driven sump pump.
High-Frequency Troubleshooting FAQ
Q: Module “OK” LED Green, but reading “0” or “32767” (full scale) on a channel. Wiring checks out, transmitter is alive.
A: Range Mismatch or Wiring Mode.
- Check the Channel Configuration in PME (Hardware → → Channels). Is the Range set to match your field signal?
- 4-20mA Tx → Set “4-20mA Current”
- 0-10V Tx → Set “0-10V Voltage”
- 1-5V (representing 4-20mA) → Set “1-5V Voltage” or use external 250Ω + “4-20mA” range.
- For 2-wire (loop-powered) 4-20mA Tx: Land Tx (+) → ALG320 Ch+; Tx (–) → Ch–; ensure the Terminal Base COM terminal has the 24V DC supply 0V (many VersaMax analog inputs reference to the base COM terminalfor the internal shunt return — check your base wiring diagram: usually you land DC Supply +24V to the Tx, and DC Supply 0V to the TBM001 COM terminal so the loop completes through the 250Ω shunt to 0V).
- If set to “4-20mA” but you see “0” with a live loop → check COM terminal landing. Open circuit on COM = no return path = 0 reading.
Q: Reading fluctuates wildly (+/- 5% or more) on a stable signal.
A: Electrical Noise / Incorrect Filter.
- Verify shielded twisted pair was used. Drain shield at the Terminal Base COM (or DIN rail ground) — one end only(typically sensor end if grounded casing; if floating, drain at the base COM).
- Increase the Input Filter in the channel config from “None” to 8ms or 16ms. This averages samples over the filter time and rejects 50/60Hz ripple from nearby VFDs/contactors.
- Ensure the analog common (TBM001 COM) is tied to the system 0V — a floating common injects noise.
Q: CPU shows “Module Not Found” or “%AI addresses read 0 / Faulted” for this module.
A: Slot Mismatch or TBM001 Not Seated.
- Verify the Slot Number in PME Hardware Config matches the physical slot in the VersaMax base (Slot 1 = rightmost or leftmost depending on base rev — check base silkscreen; usually Slot 0 = CPU/NIU, Slot 1 = first I/O to the right).
- Ensure the IC200TBM001 is fully seated — snap it onto the until the latch clicks. A loose can cause intermittent coms or the module not to be detected.
- Check the Base Power Supply (IC200PWR001/002) in Slot 1 — “PWR” LED Green? If the base 5V sags, I/O modules may drop offline.
Please note: The listed price is not the actual final price. It is for reference only and is subject to appropriate negotiation based on current market conditions, quantity, and availability.