Field Engineer’s Notes (From the Trenches)
The “Gotcha” is Torque and Wire Prep.
Torque: 7 lb-in (0.79 Nm) is specific. Do not use a “gorilla grip” #2 Phillips. You will strip the head or splay the brass terminal insert, causing a high-resistance connection that heats up under load (common on 24V DC solenoid returns). Use a small torque screwdriver. If a wire pulls out with a finger tug, it was too loose. If the screw spins freely after tightening, the brass insert is stripped (replace block).
Strip Length: 0.310″ (7.87mm). Too short (<0.25″), and the copper won’t reach the clamping surface (open circuit). Too long (>0.4″), and you leave exposed copper past the screw, risking a short to the adjacent terminal (especially on 120V AC commons). Use the strip gauge molded into the bottom of the block (if present on your rev) or a fixed-stop stripper.
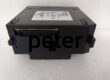
Removal: To remove the block from the module (for module swap), open the clear cover, then depress the two side latches (or slide the latch bar up, depending on rev) beforepulling. If you just yank it, you will bend the male header pins on the I/O module. Those pins are delicate; a bent pin shorts adjacent channels. Always support the block with one hand while depressing latches.
Real-World Applications
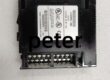
- Bottling Line Conveyor (24V DC Disc I/O): An IC694MDL758 (32pt Input) with an . Photoeyes land on terminals 1-32. During a fault, the module was swapped in 4 minutes by a maintenance tech without unterminating the 32 photoeye homeruns, keeping the line running during the changeover.
- Water Treatment Chemical Pump (4-20mA): An IC694ALG220 (4-Channel Analog) with . Terminals 1-4 are 4-20mA from Magmeters, 5-8 are 4-20mA to VFD speed refs. The screw terminals held the #18 AWG twisted pairs tight for 8 years in a high-humidity pump house without a single loose wire, whereas the old spring terminals on the 90-30 rack needed retightening annually.
High-Frequency Troubleshooting FAQ
A: Poor Mating (Header Pins).
- The connects to the I/O module via a male header. If the block wasn’t snapped fully home, or the latches are worn, the pins aren’t mating.
- Fix: Power down the rack (LOTO). Open the cover. Depress the latches, pull the block straight off (support it). Inspect the male pins on the I/O module for bending/splaying (common if forced). Straighten with tweezers if minor. Re-seat the : align carefully, push straight on until latches click. Power up.
Q: Wire pulls out of the terminal under vibration, even though I tightened to 7 lb-in.
A: Stranded Wire without Ferrule or Improper Strip.
- If using stranded wire (e.g., #18), the individual strands can “birdcage” or slip past the screw if you don’t use a ferrule (bootlace crimp). The screw clamps the ferrule, not the strands.
- Strip Length: Ensure exactly 0.310″. If you strip too long, the insulation butt prevents the copper from entering the clamping zone, so you are tightening the screw on insulation (no electrical contact, low pull-out force).
- Fix: Re-strip to 0.310″, add ferrules, re-torque to 7 lb-in.
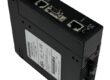
A: Mechanically identical, but the TBB132 has a deeper cover (approx 0.5″ extra) to accommodate thicker wire insulation (common with 120V AC / 600V wire). Use TBB132 for AC I/O modules; for DC. Forcing a on AC wiring with thick insulation risks pinching the wires closed.
- Functionally identical pinout, but Spring uses spring-clamp terminals instead of screws. Spring is faster to wire but less tolerant of vibration/thermal cycle relaxation on stranded wire. Choose based on wire type and environment.
Please note: The listed price is not the actual final price. It is for reference only and is subject to appropriate negotiation based on current market conditions, quantity, and availability.