")
Quick Sizing & Sourcing Snapshot
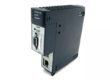
- Manufacturer: GE Multilin (General Electric / Emerson)
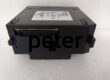
- Part Number: UR6PH
- System Platform: UR Series Universal Relays (G60, T60, D60, F60, M60, etc.)
- Hardware Type: Digital I/O Expansion Module (Compact)
- Architectural Role: Plugs into a UR relay chassis (Slot 3-6) to provide 4 isolated digital inputs and 6 Form-A (SPST) relay outputs with optional current metering, offloading auxiliary logic from the CPU.
- Key Specifications: 6 Form-A Relays (5A @ 30V DC / 250V AC), 4 Opto-Isolated Inputs (24-250V DC Config), Hot-Swappable.
System Architecture & Operational Principle
The sits in the Purdue Level 1 hardware stack, occupying a standard slot (usually Slot 3 through 6) in a UR series chassis (e.g., UR6CH or UR10CH). It connects to the main CPU (like a UR9GH) via the UR Backplane Bus, a high-speed proprietary link synchronizing I/O state with the relay’s FlexLogic engine.
Physically, it’s a single-slot module with a removable terminal block. Upstream, it receives commands from the CPU: “Close Aux Relay 1” or “Read Status of CB Spring Charge.” Downstream, it drives real-world hardware. The 6 Form-A (SPST) relays are the workhorses here—typically used for Trip Circuit Supervision (TCS), closing tallies, or driving auxiliary relays for cooling fans and alarm annunciators. The 4 Digital Inputs are optically isolated (2500Vrms), accepting dry contacts or wet voltages (24V to 250V DC, software selectable ranges).
A key differentiator for the “PH” variant is the Current Metering capability on the outputs. Unlike a dumb relay card, this module can measure the actual milliamps flowing through the relay contacts (e.g., through a breaker trip coil). This lets the UR relay detect “Trip Coil Open” or “Stuck Trip” conditions via FlexLogic rather than just relying on auxiliary contacts. It processes contact debounce locally (1ms to 60s programmable) so the CPU isn’t interrupted by switch bounce.
Core Technical Specifications
- Output Channels: 6x Form-A (SPST), Electromechanical Relays
- Output Rating: 5A Resistive @ 30V DC / 250V AC (Derating required for inductive loads)
- Input Channels: 4x Optically Isolated (Dry Contact or Wet: 24/48/125/250V DC)
- Metering: Current Sense on Outputs (Detects 0-250mA loop current)
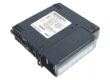
- Isolation: 2500V RMS (Field to Backplane/Logic)
- Response Time: < 8ms (Input to Backplane), < 10ms (Command to Output Close)
- Power Source: Backplane Powered (Via UR Chassis/Power Supply)
- Config: Software Selectable Input Ranges (No DIPs for voltage, only ID DIPs)
- Environmental: -40°C to +70°C (Operational)
- Hot-Swap: Yes (Module can be replaced live if chassis power maintained)
Customer Value & Operational Benefits
Trip Circuit Supervision (TCS) without Extra Hardware
The built-in current metering is the killer feature here. Old-school schemes needed separate DC transducers or shunts to check if a breaker trip coil was healthy. With the , you map the coil circuit through Output 1, and the UR CPU reads the milliamps via FlexLogic. If current is 0mA during a test pulse, it alarms “Trip Circuit Open” before you try to clear a fault and fail. This catches maintenance issues days earlier using existing wiring.
Dense Auxiliary Control in One Slot
You get 6 Relays + 4 Inputs in a single vertical inch of rack space. In retrofits where you’re squeezing a G60 into a vintage 19″ bay, you don’t want to burn two slots for I/O. The handles the “miscellaneous” stuff—fan start, local alarms, lockout relay resets—freeing up the CPU and other slots for critical protection I/O (CTs/VTs).
Noise Immunity in Switchyards
Those 4 inputs are optically isolated with software-selectable thresholds. Unlike sinking/sourcing PLC inputs that hate long cable runs in substations, these shrug off induced voltage from switching transients. You can run 250V DC bell wire from a disconnect switch 500 yards away; the reads it cleanly without the “flickering status” headaches common in older solid-state inputs.
Field Engineer’s Notes (From the Trenches)
The “Gotcha” with is Inductive Load Suppression.
Those 6 Form-A relays are rated 5A, but that’s for resistiveloads. If you’re switching a 125V DC Solenoid (Cooling Fan Starter Coil) or a Trip Coil, the collapse voltage will pit the contacts rapidly.
Rule: Add Flyback Diodes (for DC) or RC Snubbers (for AC) across the load, not the relay terminals. If you skip this, the will work for 6 months, then you’ll get “Intermittent Aux Failure” alarms as the contacts weld or oxidize.
DIP Switch Sanity: The small DIP bank (SW1) on the board edge is only for Module ID (Address 0-7). It does notset input voltage ranges anymore—that’s all in EnerVista under “Hardware Config -> I/O Card Setup.” I’ve seen guys waste an hour toggling DIPs because the inputs won’t read 125V, only to find the software was set to “24V Range.”
Current Metering Calibration: If using the mA readback, remember the lead resistance matters. A long run of #14 wire to a trip coil adds Ohms. Use the “Lead Resistance Compensation” setting in the UR setup. If you don’t, a healthy 2A trip current might read as 1.8A, and your “Low Current” alarm will nuisance trip during a winter cold start.
Real-World Applications
- G60 Generator Protection (Combined Cycle): in Slot 4 drives the 52A/52B Aux Relays for the Generator Breaker. Output 1 monitors Trip Coil A current (Metering); Output 2 monitors Trip Coil B. Input 1 reads “Fire Protection Trip” (125V DC Dry Contact). This consolidates 3 old panels into one UR slot.
- M60 Motor Protection (Water Treatment): Mounted in a remote UR6CH chassis in a pump house. The 4 inputs read “Valve Open/Limit” (24V DC) from the intake gates. The 6 Form-A relays stage the Oil Cooler Fans and trigger the “High Vibration” local horn. The current metering on the Fan relay confirms the starter coil actually pulled in, catching a bad contactor before the motor overheats.
High-Frequency Troubleshooting FAQ
A: Check the Physical DIP Switches (SW1) on the new module’s top edge. They set the Slot ID (0-7). If the old module was set to Address “3” (Slot 4) and you left the new one at “0”, the CPU expects a different serial number/ID at that slot. Set the DIPs to match the physical slot positionas defined in your EnerVista hardware config, download the setup again, and cycle power to the chassis.
Q: Output relay clicks (LED flashes), but the field device (solenoid/fan) doesn’t energize?
A: You’re likely missing the External Supply. The relays are Dry Contacts (Switches); they do notsupply the voltage to run the motor/fan. You must land your 125V DC (or 24V/120V AC) Common onto the COM terminal of the block, and run the Load Return from NO (Normally Open) to the device. If you only run the wire from the device to the and leave “COM” floating, the relay will click open/closed doing absolutely nothing.
Q: Digital Inputs show “TRUE” (Active) in the UR logic, but the field contact is definitely Open (0V)?
A: Check your Voltage Range Selection in EnerVista (Setup -> Hardware -> -> Input Configuration). If the input is wired to a 125V DC battery, but the software is set to “24V Range,” the threshold is too low, and inductive coupling from nearby CT wires might be tricking the opto-isolator into seeing a “fake” voltage. Set the range to match the field voltage (e.g., “125V DC”), and enable the Input Filter (Debounce) to 20-50ms to kill noise.
Please note: The listed price is not the actual final price. It is for reference only and is subject to appropriate negotiation based on current market conditions, quantity, and availability.